Today is part two of the hamburger related crochet projects. This project is based on
this hamburger-doggerpillar drawn by Nora that I saw on tumblr one time. One look and I knew I wanted this thing to exist and be poseable.
The shapes for this guy weren't too hard to figure out, but they are a bit more "elements of themselves" than
hamby-chan's anatomy. By that I mean each piece is a distinct section, for example, a whole tomato, not just a slice, a giant burger vs, a patty, etc. It's what helps make it be a doggerpillar.
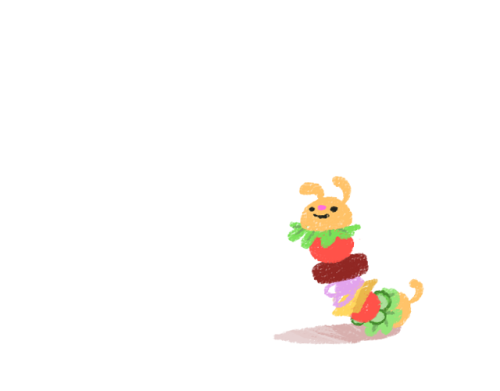
I used some of the same colors as
Hamby-chan, plus purple for the red onion, pink for the nose, and a slightly more orange bun color. I also used a 4mm hook and the 12mm safety eyes. I kind of figured out the shapes as I went along. Every segment is attached to the one before it by using the back and front loops of single crochet strategically.
Starting at the head I made the ears in line with the bun piece since I wanted him to be as few pieces as possible. I've done the same sort of thing for
Fish the Boxtroll's ears. I left a decent sized tail where I started his head so that I would have something to attach the spine to when I put it in later.
Since I wanted him to look as similar as possible to the sketch, the first lettuce leaf I even embroidered with a little of a second green to get those leaf veins.
Tomato is next. This one is actually a little larger than the second one that comes later. At the end I felt it was too large, but I didn't want to go back and redo it once I was so close to being done.
You can see that I'm stuffing as I go along. The patty came next and I tried to use back and front loops to get an edge to the piece. Later I went back with the brown and wove thread up and down through the piece, around the center, to make it more into a patty shape and be less puffy.
The red onions were next. I actually did these twice, but didn't like how the first ones came out. To get the kind of stringy look, on the last row around I simply chained a bunch and tacked them down with single crochets. I went around about three times using up free spots in this way to get onion strings of various lengths. Think it came out pretty cool looking.
Here you can see I added the cheese on. Personally I think I would want more cheese on my hamburger doggerpillar, but again, staying on model this is where it came. It was a little tricky figuring out how to make my round shape into a square-ish piece of cheese that I could keep working from.
The second tomato is only one row shorter than the first, but I think it makes a better shape. Again, I didn't figure it out till down here and I didn't want to go back and try to fix the first one. Under this second tomato are the pickles! I had a little bit of a hard time figuring out that is what they were since all I really saw in the picture was the dark green outline and I thought it was bell pepper or something. Pickles makes more sense. I used the green from the first lettuce embroidery to make them and then went and added a darker green border for the rind of the pickles.
After the pickles there is a second leaf of lettuce which I left plain since the pickles covered most of it. With that second lettuce done there was only the butt bun left to make so I started working on the spine. You can see it sticking up out of his head and out the back as well.
The rudimentary spine is made from using aluminum floral wire from the craft store. I estimated out two full body lengths of the wire and then folded it over and twisted all the way down to get it double thick. This also made a loop on the top that I could use the tail the head to attach through the loop. I twisted it closed around the yarn and pulled the end to get it to retract into the head.
I found an old sock and filled it with those plastic beads that weight stuff down; you could use rice or beans I guess. Once the bean bag was ready I started on the butt bun. I did about half and worked the tail then after I did the first row of decreases I set the bean bag into the shape as it was forming. I wrapped the end of the wire spine around it to help keep it in place. I was hoping this would help weight the end down and let him sit up a bit on his own, but it didn't really work for that. It does help keep the spine in place though so that is good.
Finally he was done! Personally I love this guy. He is super cute and happy looking. Now that I have a pattern for all the pieces, I feel like I could make a ton of these with different amounts and arrangement of toppings and segments. This is a great stash buster too (if you make a ton of em). You could easily put a rattle or squeaker in these too... so many good ideas here.
Nora took a look and loved it when I
shared it on tumblr. So happy to make others smile. :)
Difficulty: Easy +
Time to complete: 8 hours or so
Finished size: 13 inches long, each piece about 3.5 in wide